10 Aging-in-Place Features Pros Swear By

Dusty Rhodes • March 16, 2026

They’re often called aging-in-place features, but things like curbless showers, nonslip flooring and wide walkways and doorways can benefit everyone, no matter their age or ability. “Regardless of aging in place, there is a place for these in day-to-day life, whether it be a teenager on crutches, a family member having had surgery, active kids,” designer Dana Bass says. “It’s not just about aging in place. We’ve got to account for unplanned life emergencies.”

Designer Tammy Battistessa of 
Ellaire Kitchen & Bath Design agrees. “Whenever possible, I include aging-in-place and universal design features in every project, as I believe many of these features benefit clients of all ages and abilities, in addition to allowing a client to safely remain in their home for a longer period of time,” she says.

Creating a home that can adapt also makes it more sustainable. “Aging in place is a key element to making legacy homes that can evolve over time,” architect 
Tim Barber says. With all that in mind, we asked more than 50 home design and construction professionals to share the aging-in-place features they always recommend. Here are the 10 that came up again and again.


1. Wide Walkways and Doorways

Planning ahead is one of the most important steps when incorporating aging-in-place features. Many of these elements require thoughtful design and construction, so it’s wise to start early — and to consider hiring professionals who understand the nuances. “Thinking through how you will really use the space makes all the difference,” designer Haiku Durden of 
HDS Design says. “Having a designer involved really makes a difference.”

A professional can help you create a plan that works for your current needs and anticipates future ones. “We currently default to aging-in-place features when our clients are near retirement or retirement age,” says designer Jenny Guggenheim of 
Guggenheim Architecture and Design Studio. “Preplanning by adding blocking behind the wall finish, spacious floor planning to allow for wheelchair or walker use.”

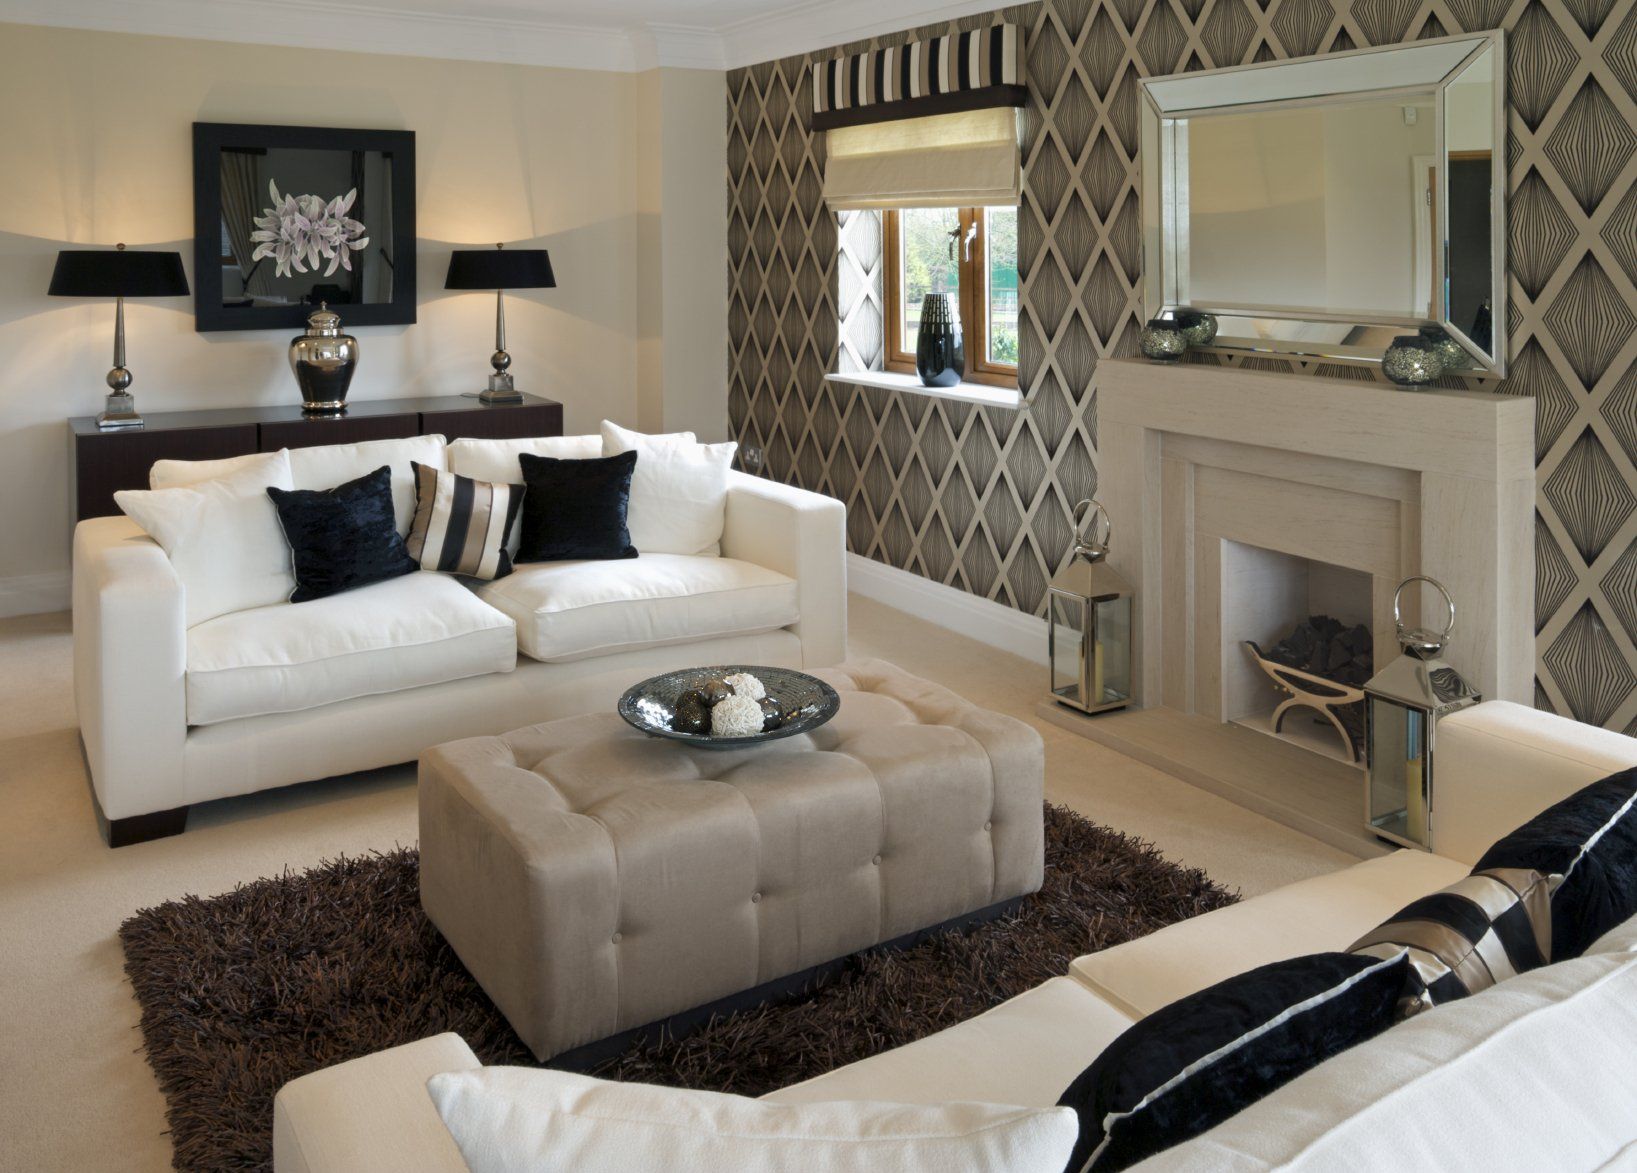
In fact, spacious layouts are among the most commonly recommended aging-in-place strategies. Wide walkways and doorways — and generous clearances around furniture and fixtures — make it easier for anyone to move through the home comfortably. Installing a continuous flooring material throughout also reduces tripping hazards caused by changes in height or texture between rooms.

Wide doorways and pathways are essential components of an aging-in-place design. “If space allows, I always design with a minimum of 36-inch doorway openings,” Battistessa says. This extra width provides easier access for mobility aids like walkers and wheelchairs and simply makes moving through the home more comfortable for everyone.

It’s also important to keep hallways and transitions between rooms simple and direct. “All connections from hallways into another space need to be more direct, or broader,” designer Cathy Cherry of 
Purple Cherry Architects says. “The goal is to avoid creating tight turns, so when aging in place you can navigate those connections easily.”


In the kitchen, designers recommend at least 48 inches of clearance between countertops and an island to ensure a safe and accessible work zone. “We make sure aisleways in kitchens are 48 inches or more,” designer Alex Bowman of Kirby Kelly Studio says. “That really helps plan for future assisted access.”

Appliance placement and workflow are equally important. “Make sure you really consider the kitchen triangle as you get older,” builder Amy Hendel of Hendel Homes says. “You want to have your kitchen very functional.”

2. One Floor, No Steps

Many design and construction professionals agree that the safest homes are single-level and with minimal or no steps. “Ideally, there are no steps at all throughout the house, from the garage to the house, or into showers,” Cherry says.

Thoughtful layout decisions can also make daily life easier. Designer Stephanie Larsen recommends placing the garage close to the kitchen whenever possible. “When possible, this thoughtful choice allows for added ease when unloading heavy groceries,” she says.

Even if you’re not building a home from the ground up, there are still smart layout strategies to consider. “In a two-story home, we might reconfigure the downstairs to create a comfortable and accessible living space so clients can avoid frequent trips up and down stairs,” designer Maegan Swabb of M. Swabb Interior Design says.

Swabb says her firm uses Houzz Pro software for all of its accounting and client communication needs.


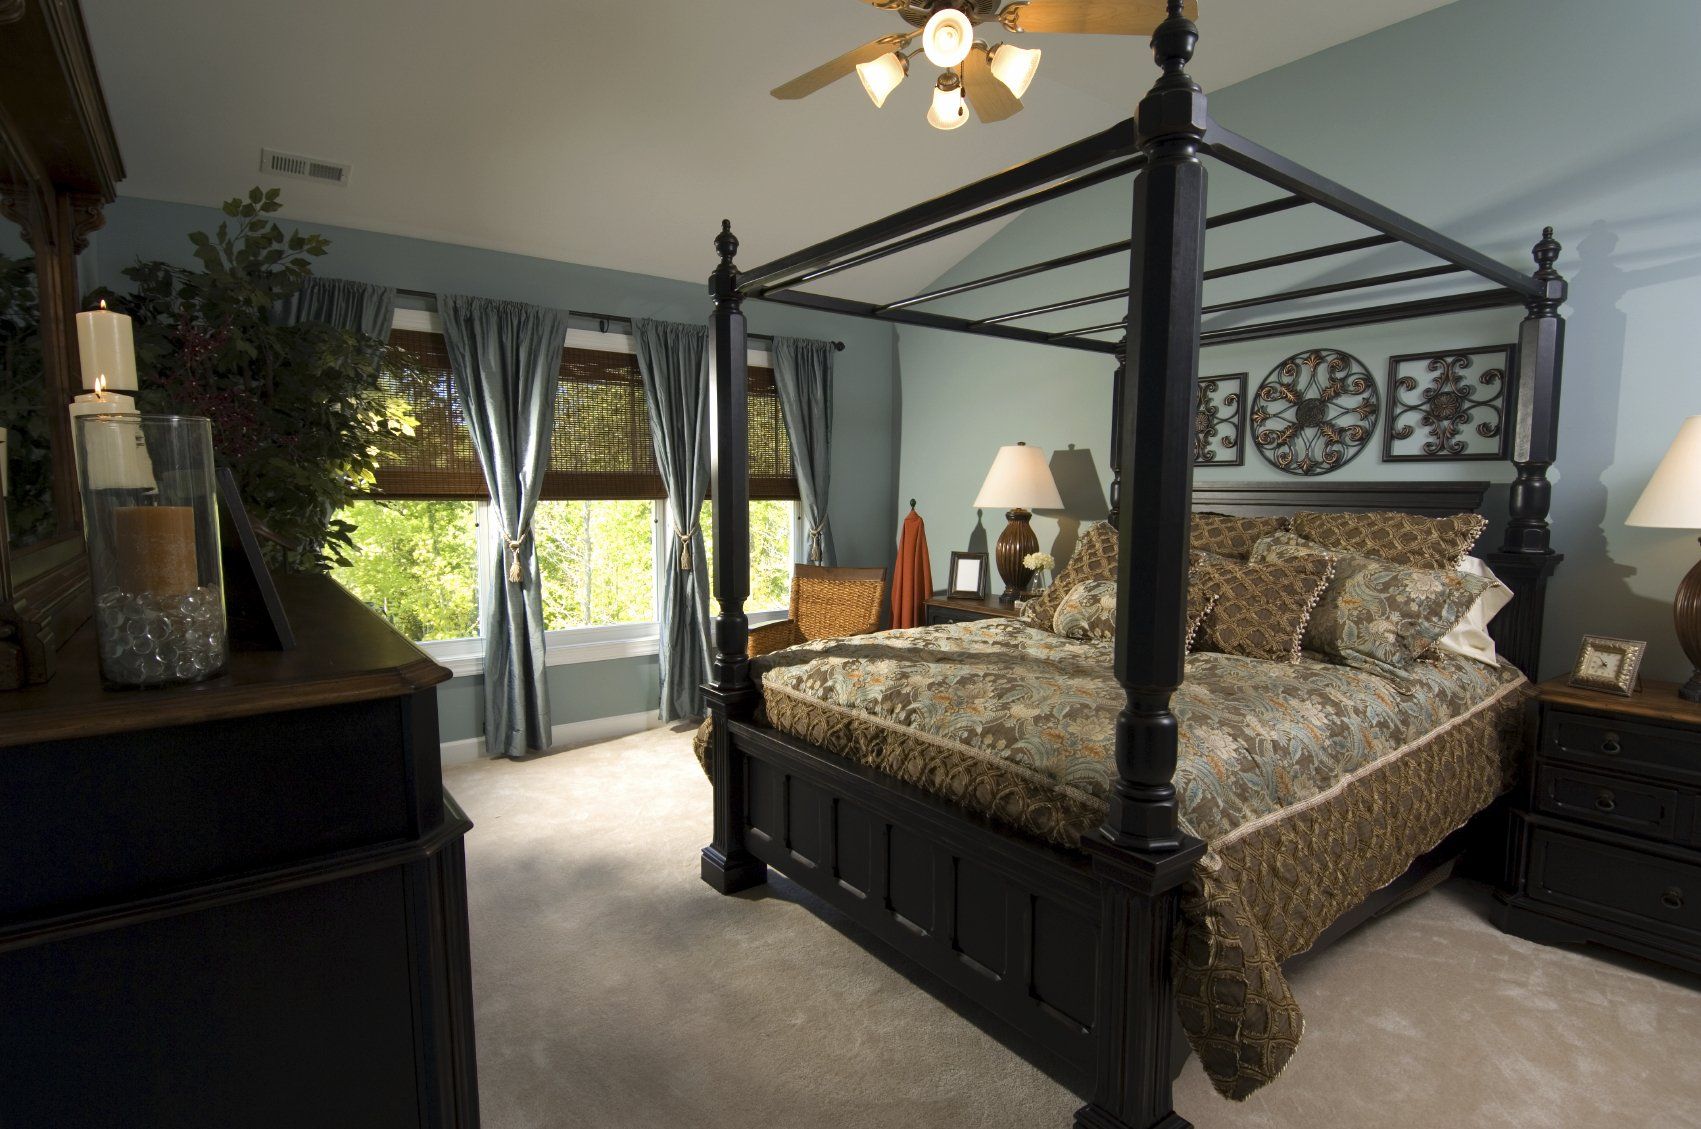
A spacious primary suite on the first floor is another key element of an aging-in-place design. It’s important to allow ample room to move comfortably around the bed and furnishings — and to accommodate medical equipment if needed. “When planning for long-term aging in place, you’re not solely thinking about access issues,” Cherry says. “You’re also thinking about potential staffing support issues, how to provide fantastic views should one become bedridden, the ability for individuals to move themselves and the ability for others to be able to move them.”


If steps can’t be avoided, consider adding a ramp with a gentle slope to create a smooth and accessible transition into the home.
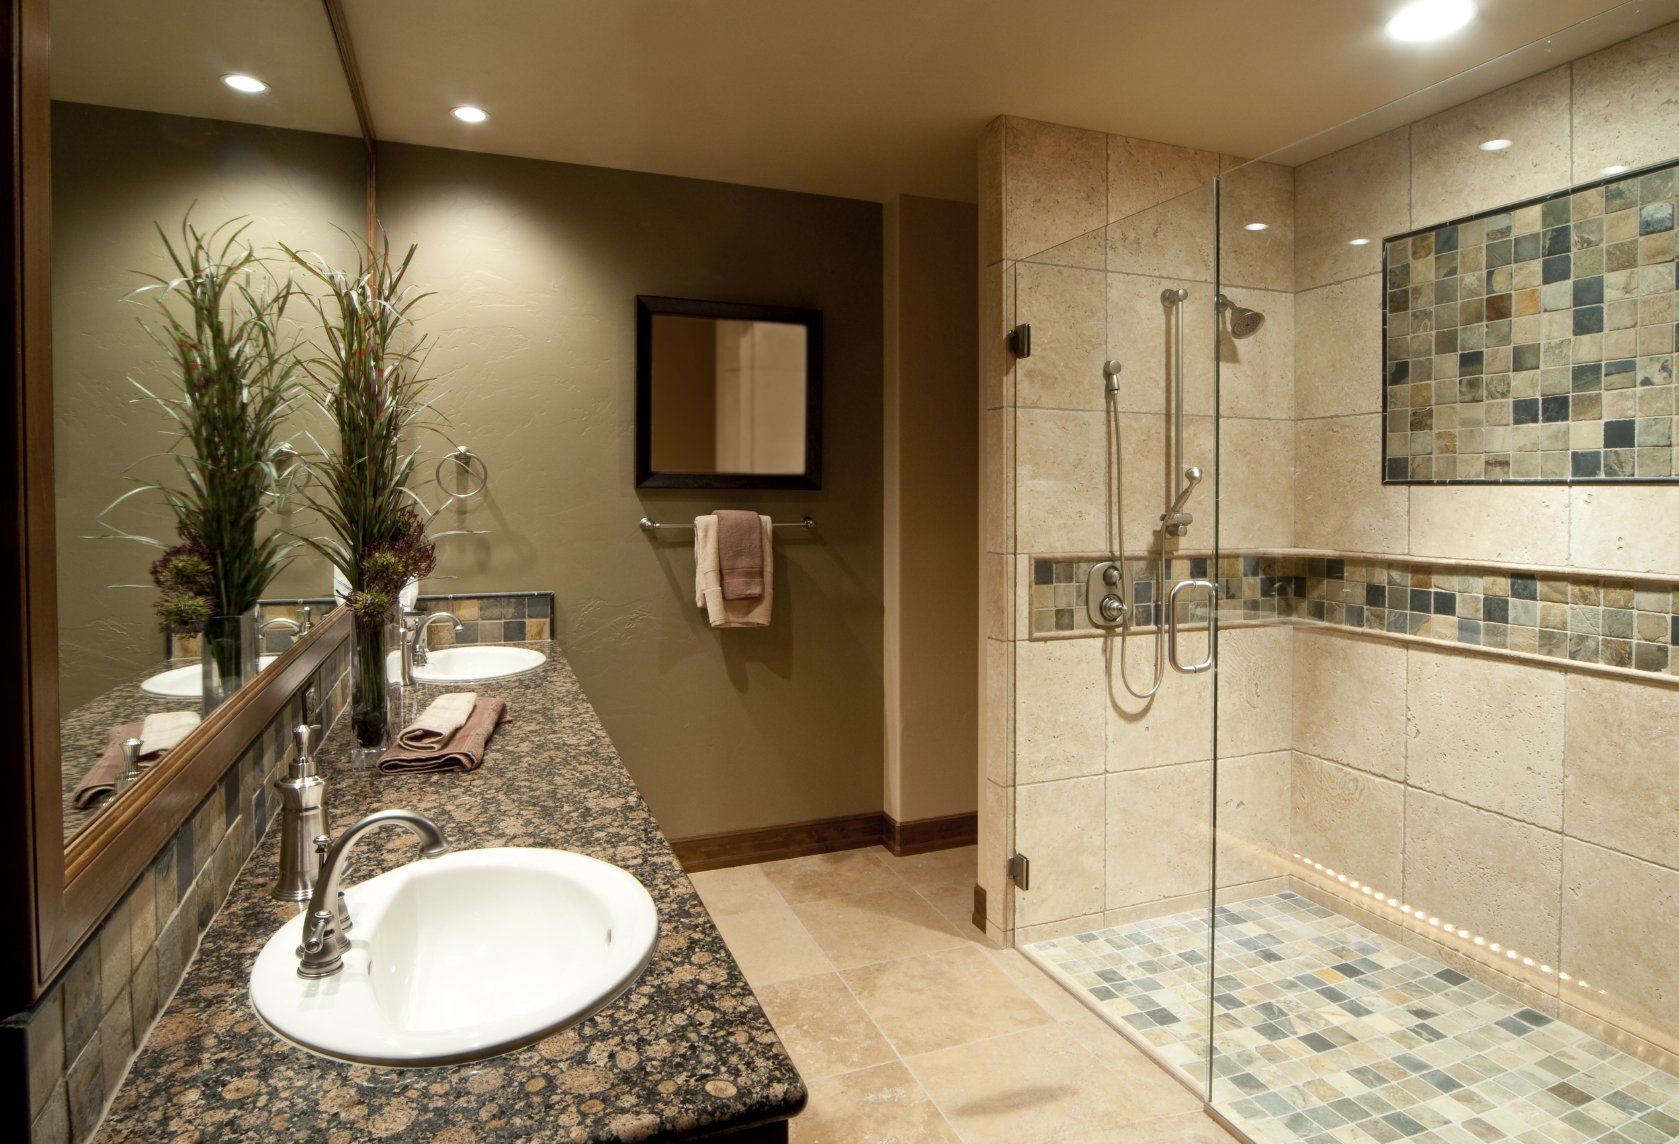
3. Curbless Shower

One of the most highly recommended features for aging in place is a curbless shower. By eliminating the threshold into the shower area, this design creates a smooth, barrier-free entry that enhances safety and accessibility — especially for those using a wheelchair or walker or who have limited mobility. “I always recommend that clients invest in curbless showers and grab bars,” Larsen says. “These additions help to avoid trips and slips and are functional in the event that a wheelchair or walker is needed when they are older.”

4. Grab Bars

Grab bars are an essential component of any bathroom designed for aging in place — but they require proper planning. These safety features can’t be mounted just anywhere. Structural backing must be installed behind the wall to ensure the bar can safely support weight and pressure during use. Even if you don’t need grab bars right away, design and construction professionals strongly recommend adding the necessary backing during a remodel or new build so the space is prepared for future installation.

Modern grab bars are also more stylish than ever. Many double as towel bars or toilet paper holders, blending seamlessly into the space. Some even come as part of coordinated bathroom fixture collections, making it easy to match them with shower heads, faucets and other components.


Professionals recommend installing grab bars in the shower — particularly near a bench — and alongside the toilet to enhance safety and offer support where it’s needed most.

5. Bench

A bench is a crucial aging-in-place feature in a shower, offering a comfortable place to sit if needed. Paired with a nearby handheld sprayer, it allows users to shower while seated with ease and independence.

Designer Donna Kirsopp of 
Schloegel Design Remodel created a curbless shower with double doors specifically meant to accommodate wheelchair access. “The shower features a handheld shower head on a sliding bar, which doubles as a grab bar,” she says. “A thoughtful detail is the angled bench, providing a more ergonomic seating position that allows feet to rest comfortably behind, making showering while seated much easier. To enhance the experience further, the entire bathroom floor and shower bench are heated, offering a luxurious touch while maintaining functionality.”


Designer Kristen Benavides of Benavides Design House recommends a freestanding bench “so it can move around to accommodate a helper in the space if also needed down the road.”

6. Handheld Sprayer

As mentioned, a handheld sprayer positioned near a bench enables homeowners to sit and rinse off safely and comfortably. It also provides greater functionality for caregivers assisting with bathing. For added convenience and safety, choose models mounted on a slide bar that doubles as a grab bar.

7. Nonslip Flooring

Nonslip flooring is a smart choice throughout a home, but it’s especially critical in bathrooms and kitchens, where water exposure is frequent. In bathrooms, designers often recommend mosaic tiles with matte finishes and multiple grout lines, which offer improved traction. Classic pebble tile is also a popular option thanks to its naturally textured surface that helps prevent slips.

8. No-Bend Features

For many, bending over can cause pain or increase the risk of injury. When creating a kitchen for aging in place, pros try to minimize excessive bending and reaching. Wall ovens are a popular solution. “Many clients prefer a double oven or wall oven instead of the standard range so they don’t have to bend over to open the oven,” designer Alena Zoghi of 
Eskan Design Build says.


Drawer storage is another highly recommended feature for aging-in-place kitchens. “This reduces the need to bend down and reach for items, making it safer and more convenient,” designer Melissa Powell of Design Shop Home & Interiors says.

Designer Bonnie Kespohl of Kasa Interior Design agrees. “I’m recommending more drawer storage over cabinet doors with shelves to eliminate the need to squat down to see what’s inside a cabinet,” she says. “Pulling out a drawer and looking inside from the top view is a lot less strenuous and more efficient storage. You’re able to see what’s inside the space all the way to the back, which is so much more user-friendly.”

Barber always includes “wall ovens that don’t require bending, freezers on the bottom of refrigerators, plate storage at a convenient height and pullout shelves and Hafele magic corner base units to make deep spaces accessible. We often design counters at varying heights, especially for bakers, enclosures for small appliances at countertop height and shallow spice shelves at eye level on the back side of wall cabinet doors.”

Designer Katie Geresy of 
KTG Design recommends raising countertop heights to 37 inches. “The standard is 36 inches, but we always like to add an extra inch because you do notice the difference,” she says. “You don’t have to slightly bend at all when working in your kitchen or using the sink in your bathroom.”


If you’re including upper cabinets or already have them, consider installing pull-down shelving systems like the one from Rev-A-Shelf shown here. These systems bring items down to a comfortable, reachable height, reducing the need to stretch, reach or lift awkwardly.


Another smart idea is to raise laundry appliances to a more comfortable working height. Adding a pullout shelf below provides a convenient spot to place a laundry basket.

9. Abundant Lighting

As we age, our eyesight often diminishes, making well-lit spaces essential for safety. Poor lighting can increase the risk of accidents, so it’s important to provide ample, thoughtfully layered lighting throughout the home. “Our lighting is usually on a smart system — one easy button press will illuminate an entire room’s scheme — so you’re not running all over the place trying to light a space,” Bowman says.

In the kitchen, combine recessed ceiling lights with pendant fixtures and undercabinet lighting to create balanced, versatile illumination. Low-level lighting, such as LED strips installed in toekicks, is also a great addition — it softly lights pathways and helps prevent trips and falls during the night.

Here’s a good example of toekick lighting. This soft, low-level lighting is also recommended for bathroom vanities to provide safe guidance during nighttime bathroom visits.

“Glare is another important consideration when selecting materials,” designer Jennifer Morris of 
JMorris Design says. “Shiny surfaces can be hard on the eyes.” Morris uses Houzz Pro software to help manage her design projects.

10. Easy-to-Grip Levers and Handles

Grip strength is an important consideration when designing a home for aging in place. Small cabinet knobs can be hard to grasp and pull, and traditional faucet knobs often require awkward twisting motions. That’s why experts recommend choosing faucets with lever handles and cabinet hardware with sturdy pulls. “These are easier to operate than traditional knobs, making them more accessible for those with limited dexterity,” Powell says.

Another convenient option is a touch-free faucet, which activates with a simple wave of the hand. Some models even respond to a gentle tap on the faucet, offering hands-free control that’s both hygienic and user-friendly.


Source: Houzz


Dusty Rhodes Properties is the Best Realtor in Myrtle Beach! We do everything in our power to help you find the home of your dreams. With experience, expertise, and passion, we are the perfect partner for you in Myrtle Beach, South Carolina. We love what we do and it shows. With more than 22 years of experience in the field, we know our industry like the back of our hands. There’s no challenge too big or too small, and we dedicate our utmost energy to every project we take on. We search thousands of the active and new listings from Aynor, Carolina Forest, Conway, Garden City Beach, Longs, Loris, Murrells Inlet, Myrtle Beach, North Myrtle Beach, Pawleys Island, and Surfside Beach real estate listings to find the hottest deals just for you!

Share

By Dusty Rhodes April 13, 2026
Tired of an untidy house? Try a new approach by adopting habits that automatically keep your home orderly Keeping our homes orderly and free of clutter is a struggle for many of us, especially if we’re not naturally organized . If you fall into this category, there’s definitely hope — you just may need to change your habits. Before you roll your eyes and shrug off that idea as impossible, let me tell you what has helped me keep a tidier home. I tried a concept called the “habit loop,” which is described in The Power of Habit: Why We Do What We Do in Life and Business, the best-selling book by Charles Duhigg. The habit loop consists of three steps: cue, routine and reward. The cue is a reminder that initiates the new behavior. The routine is the behavior itself. The reward is the benefit you get from implementing the new behavior. Duhigg says that during the first two weeks of developing a new habit, it’s important to give yourself a treat that you really enjoy right after you complete the new behavior. This will teach your brain to enjoy the new routine. While I’m a professional organizer and really do enjoy decluttering and organizing, I also have an extremely busy life and like to do a lot of other things besides organizing my house. Using the habit loop really helped me get into daily, automatic tidying habits. Perhaps this approach could offer a fresh, effective way for you too to conquer clutter in your home. Here’s how I use it. Tackle Your Own Spaces First If you want to form new no-clutter habits, it’s usually easiest to begin by dealing with your own possessions in spaces you don’t share with all family members. Personally, I live with some wonderful but messy people, so if you’re in the same situation, I recommend you start with your bedroom and bathroom. Duhigg says there’s no precise time frame for how long it takes to form a new habit, but other researchers report it takes 21 to 66 days or even longer. Personally, I needed 21 to 45 days of the habit loop to form a new habit, depending on what the routine was. After that, the behavior became automatic. 1. Make your bed. No matter how messy the bedroom is, a made bed makes it neater. To create a cue for making the bed, pick something you do without fail every day, such as turning off your alarm. It’s best to do the new behavior as soon as possible after the reminder. (I sometimes get distracted if I don’t make my bed right after my cue, and then the bed might remain unmade all day.) After you make the bed — or, for that matter, after you do any new task you’re trying to make habitual — be sure to reward yourself. Your reward can be as simple as a silent “Good job!” you tell yourself or as ritualistic as brewing your morning cup of coffee and then enjoying sipping it. Just remember to give yourself a compliment or perk for working toward your tidy-house goal. 2. Clear your bathroom counters. Brushing my teeth has become the cue I use to trigger my habit of clearing my bathroom counters both morning and night. Each morning after I brush, I put away my makeup, hair products, blow dryer and toothpaste. Then I wipe off the water that has collected on the countertops. I repeat the routine at night, putting away my lotion and other nighttime beauty products. Then I congratulate myself on a job well done. Though I didn’t get it right the first few days, within 21 days I knew I’d managed to develop this habit when I automatically began clearing the counters after brushing. For me, coming home to a clean bathroom is the greatest reward! 3. Put away your attire after wearing it. On most days I wear two different outfits, one for work and one for exercise. If I’m not paying attention to where I put my things, a mess can quickly build up. So I decided that removing my clothes would be the cue to place dirty clothes in the hamper and those I’ll wear again neatly in the closet. If you share a closet with a partner who doesn’t want to participate in this routine, you have a couple of options: You can put your partner’s clothes away or leave them out, knowing that at least half the mess is put away. Since nagging or brooding rarely changes other people’s habits, it might be better to give yourself a reward for cleaning up your own mess and move on. Tackle Common Rooms Next As you move into the common areas of your home, prepare for potential barriers to establishing tidy habits since you may be dealing with other family members’ messes. While this can be frustrating, if family members aren’t cooperative I recommend simply focusing on clearing your own mess. Hopefully, your new habits will eventually rub off on your family. If not, well, your home will still be less cluttered than it was before your new habits. 4. Unbury coffee and end tables. Your cue for clearing the tables in your living room could be turning off the television or putting down the book you were reading. Remove cups, glasses and bowls from the room’s flat surfaces and place them in the dishwasher. Put magazines back in their rack or recycle those you’ve finished reading. Place remote controls in a basket next to the television. Put away books and papers and anything else left cluttering the room. Then congratulate yourself. Your living room will look great in the morning when you start your day. 5. Clear the kitchen counters. Mail, school papers, ear buds, cellphones, vitamins, dog treats, receipts, tissue boxes, keys and more can litter kitchen countertops, making food prep difficult. Plus, this type of miscellaneous debris makes the kitchen look messy and disorganized even if cooking surfaces are cleared. My personal cue for clearing my countertops each night is closing my dishwasher door after I load it. I then scan all the miscellany on the counters and quickly sort and put everything in its place. This may take me an extra 10 minutes, but by doing it each evening I find it is easier to keep the counters clear during the day. I then reward myself with a small piece of chocolate since this habit is much harder to implement than others! My other reward is coming downstairs in the morning to a clean kitchen. 6. Tidy your front hall. I walk through my front hallway on the way to bed and use the walk as my cue to tidy up the space. We have a hall closet where I can store shoes and coats, and each family member has a basket in the closet for personal items. If you don’t have a front hall closet, you might consider storing catchall baskets under a decorative table. I tell myself, “Great job!” before I head off to bed. It’s wonderful having a clutter-free front hall, especially when unexpected visitors stop by. Develop New Habits on What You Bring Into Your Home 7. Manage your mail. Mail is a major source of clutter in many homes. To cut down on the volume, you might want to receive bills and magazines electronically. There are also tools available for unsubscribing from catalogs and unsolicited credit card offers; visit DMAchoice.org or Catalogchoice.org for more information. Even with these steps, mail still has a way of piling up and causing a mess. One relatively easy habit to develop is sorting your mail before you enter the house. I collect my mail from the mailbox and walk directly to my recycling bin, where I immediately place advertising circulars. I then open unfamiliar envelopes (which usually are ads) and toss them in the bin. Since I receive most of my statements electronically, I’m left with very little to bring inside. Remaining items go into an inbox for incoming mail. I then give myself a pat on the back for preventing clutter from entering my house. 8. Be intentional with your purchases. Another habit to consider implementing is being mindful of your purchases. I’ve developed the habit of thinking seriously about the clutter factor of every purchase before buying. As I reach for my credit card, I am reminded to stop and consider whether I already own something that will suffice. I also think about where I’m going to store the item or what I’ll get rid of to make room for the new purchase. For example, when I’m considering a new pair of pants, I ask myself what I have in my closet that might be similar. If I already have too many similar items and don’t want to part with any I already own, I skip the new purchase. I use a similar approach when considering household and kitchen items. My purchases are always intentional because I’m working hard to live in a clutter-free home. I deserve a big pat on the back for working on this habit. I’m not only reducing clutter but I’m also leaving more money in my bank account at the end of the month to spend on things I truly want or need. 
By Dusty Rhodes March 30, 2026
When you’re selling your home , it is natural to assume that anything you can safely remove is yours to keep—like the light fixtures you painstakingly cleaned and repaired, or the appliances you bought last year. But the truth is, the buyer may want some of those items, too, and sometimes it's better to part ways with these items for the sake of the sale. Rather than keep everything, you should decide what you'd like to keep and what you'll leave behind as a way to entice buyers into making an offer, particularly in today's market where buyers are holding more of the cards than ever. What stays with the house? Generally, certain items stay with the house when you sell and move. Some features may seem obvious, but the truth is, you're probably expected to leave more behind than you think. Some of these items can include: Built-ins: Built-in bookshelves, benches, and pull-out furniture generally stay inside the home. Landscaping: Trees, shrubs, and any flowers planted in the ground should stay in the yard. Wall mounts: If you have TV wall mounts or picture mounts that might damage the wall if you remove them, it is a good idea to leave them in place when you move. Custom-fit items: If you have custom-made curtains , plantation shutters, or blinds, leave them on the windows and doors. Hardware : If you upgraded the knobs and drawer pulls in the bathrooms and kitchen, you should either leave those behind or install replacements before you move. Alarm systems : Wireless alarm systems are designed to be removed. Otherwise, leave the alarm monitoring station attached and either relocate or cancel the monitoring service. Smoke detectors : Smoke detectors and sprinkler systems should stay in the house, especially if you plan to move before selling the house. What can you take? While you’re expected to leave some items behind, in general your belongings are yours to keep. Here are some examples: Patio furniture, lawn equipment, and play sets : If you have a wooden swing set in the backyard and a bistro table on the front porch, take those items with you. Appliances : Some lenders require that a home have an oven installed before approving a loan, but for all other appliances, it's up to you to decide what you will take and what you will offer as part of the home. Some light fixtures : Generally, homeowners leave light fixtures behind, but if you’re attached to a certain fixture, you can make arrangements with the buyer to take it. Built-in kitchen tools : If you can safely remove a mounted spice rack or the pasta arm, you can take it with you. Rugs, basic curtains, wreaths : Small decor items like rugs or curtain rods that can be safely removed can be taken. What should you consider leaving? Some of your personal items can be used to help sell your house—or increase the asking price. Before you take everything just to take it, consider offering some hot items like the following: Appliances : Homeowners, especially new homeowners, don’t always have their own appliances. Many buyers would be more likely to place an offer on a home if it came fully stocked with appliances. Custom swing and play sets : If you have a swing set or playhouse your children have outgrown and you notice a potential buyer has children, offer to include the item with the deal. Kitchen built-ins : Built-in spice racks, pantry organization, and windowsill shelves can really help sell a kitchen. Consider offering the items to an interested buyer. Light fixtures, curtains, rugs, and other upgrades : If you’ve upgraded the light fixtures or have custom rugs in the entryway, a buyer may be willing to increase his or her offer to keep those items in the home.  If you’re not sure what would entice a buyer, ask your real estate agent to provide suggestions. Don't have an agent yet? Here's how to find a real estate agent in your area.
By Dusty Rhodes March 23, 2026
Let’s be clear: selling your house is absolutely possible right now. According to the National Association of Realtors (NAR), roughly 11k homes sell every day in this country. And the sellers who are making their moves happen all have one thing in common: they’ve adjusted their strategy to match today’s market. They’re realizing inventory has grown. Homebuyers are more selective. And buyer expectations are higher. The sellers who struggle are usually approaching today’s market with yesterday’s expectations. Here are the three biggest mistakes they’re making – and how to avoid them. 1. Pricing Based on What Their Neighbor Got a Few Years Back Setting your price is the most important decision you make when you sell – and the one that’s most often mishandled. Realtor.com data shows almost 1 out of 5 sellers in 2025 had to drop their price. Here’s what those sellers went wrong. Buyers have more choice and more negotiating power now that inventory has grown. And house hunters will actively avoid your house is if feels like it’s priced too high. That’s why overpricing usually leads to: Fewer showings Less competitive (or lowball) offers Longer time on market And all three of those side effects are things you don’t want to deal with. What To Do Instead: The good news is the cure is simple. Just price for today’s buyer, not yesterday’s headlines. Lean on your agent’s knowledge of recent comparable sales, current competition, and local buyer behavior to land in the value “sweet spot” that drives traffic and urgency from day one. 2. Trying To Skip Repairs That Buyers Now Expect A few years ago, you could sell as-is and still get well above asking. Today? Not so much. Right now, NAR says two-thirds of sellers are making at least some repairs. And the reason why is simple. In a market with more inventory, buyers compare homes side by side. Homes that don’t show well (or feel dated) are going to lose attention quickly, even if the issues are minor. What To Do Instead: Ask your agent which high-impact, low-stress updates they’d recommend for your house. The goal isn’t perfection. It’s helping buyers see themselves moving in without a mental to-do list. Small investments in staging, repairs, and curb appeal can make a huge difference in how quickly offers come in – and how strong those offers are. 3. Playing Hardball When Buyers Try To Negotiate Today’s buyers have housing affordability at the top of their minds. And since money is already tight, they’ll be pickier and will probably ask for some compromises from you. Whether that’s making repairs, giving them a credit at closing, or taking just a few thousand dollars off your asking price, negotiating is normal again. So, if something pops up in the inspection, you’re going to need to be open to talking about it. If you’re not, you may very well see your buyer walk away. And some sellers are figuring this out the hard way. Redfin data shows one of the big reasons home sales fell thru in 2025 was inspection or repair issues. Odds are those homeowners weren’t willing to flex a bit to get the deal done. What to Do Instead: Meet with your agent to make sure you understand what buyers in your area care the most about. Align your price with value, present the home clearly and confidently, and stay open to reasonable negotiations that keep deals moving forward.